Getting started with Playwright with Jest and TypeScript
Playwright is a newish end-to-end cross-browser testing tool from Microsoft. I usually use Cypress for these kinds of tests on SPAs, but Playwright is quickly gaining traction, so I thought it was time to give it a try.
We’ll cover how to get up and running with Playwright using Jest as the test runner and how to set up the project so that we can use TypeScript to write the tests. Towards the end of the post, we’ll cover how to debug tests in VS Code.
Installing
To install Playwright, run the following command in a terminal:
npm install --save-dev playwrightAdding TypeScript
Playwright tests are written in JavaScript by default. To write our tests in TypeScript, we need to install TypeScript into our project:
npm install --save-dev typescriptLet’s add the following tsconfig.json to configure TypeScript:
{ "compilerOptions": { "target": "es6", "lib": ["dom", "dom.iterable", "esnext"], "strict": true, "module": "commonjs", "noEmit": true }, "include": ["src"]}This assumes our test files will be in the src folder.
Adding Jest
By default, Playwright tests are executed with Node. Adding Jest gives us a test runner to work with that has a great API. Let’s install it:
npm install --save-dev jestWe also need to install ts-jest and Jest’s types because we want to use TypeScript:
npm install --save-dev ts-jest @types/jestThere is also a Jest preset for Playwright that we are going to leverage:
npm install --save-dev jest-playwright-presetLet’s add a jest configuration file called jest.config.js that has the following content:
module.exports = { preset: "jest-playwright-preset", testMatch: ["**/__tests__/**/*.+(ts|js)", "**/?(*.)+(spec|test).+(ts|js)"], transform: { "^.+\\.(ts)$": "ts-jest", }};Here we have told Jest to use the preset we just installed. We have also told it to pick up TypeScript files (as well as JavaScript files) and process them with ts-jest.
The last step before writing a test is to add an npm script to run the tests in package.json:
{ ..., "scripts": { "test": "jest", "test.watch": "jest --watchAll" }, ...}Writing a simple Playwright test
We will write a straightforward test on the home page of this blog. We are going to check that the title of the page is correct.
We configured Jest to look for tests in files with names that end with .spec.ts or .test.ts. Let’s create a file in a src folder called home.test.ts with the following content:
import { chromium, Browser, Page } from "playwright";We’ve imported chromium, which we will use later to launch Chrome. We’ve also imported TypeScript types for the browser and page we are going to interact with.
Let’s add the code that executes before and after the tests run:
let browser: Browser;beforeAll(async () => { browser = await chromium.launch();});afterAll(async () => { await browser.close();});This code will launch Chrome before the tests are run and close it after they have all finished running.
Let’s add the following code which executes before and after each test:
let page: Page;beforeEach(async () => { page = await browser.newPage();});afterEach(async () => { await page.close();});We are creating a new tab in the browser before each test and closing it after the test has finished running.
Now, let’s write our test:
it("Home page should have the correct title", async () => { await page.goto("https://www.carlrippon.com/"); expect(await page.title()).toBe("All posts | Building SPAs");});Let’s run the test by entering the following command in a terminal:
npm testThe test successfully runs.

Nice! 😀
The code in the beforeAll, afterAll, beforeEach, and afterEach functions is code we’ll need to write in each test file. Also, our test is only executing on Chrome - ideally, we want to have our test run across all the browsers that Playwright supports.
jest-playwright-preset enables us to remove this boilerplate code and to test across different browser types easily. Add the following code into jest.config.js:
module.exports = { ..., testEnvironmentOptions: { "jest-playwright": { browsers: ["chromium", "firefox", "webkit"] }, }};We’ve specified that our tests should be run on Chromium, Firefox, and Webkit.
Let’s remove the beforeAll, afterAll, beforeEach, and afterEach functions in our test. We don’t need the import statement as well.
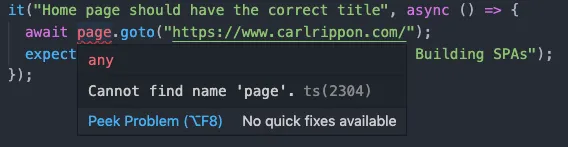
We get a type error where page is referenced in our test. The Jest Playwright preset has created a page variable that we can use, but TypeScript doesn’t realize that.
We can add the following global declaration to resolve this. Add a file called globalTypes.ts in the src folder with the following content:
import { Browser, Page } from "playwright";
declare global { const page: Page; const browser: Browser; const browserName: string;}page, browser, and browserName are global variables that we can use in our tests.
The type errors are resolved now. 😀
Let’s rerun the test by entering npm test in the terminal.
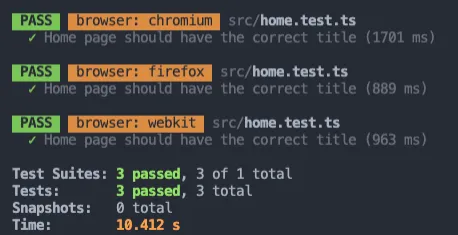
The test is executed successfully on each browser type. 😀
Debugging our test
First, we’ll use a couple of old school approaches to debug our test.
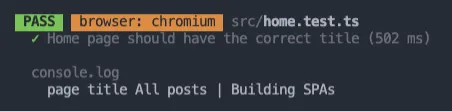
We can output useful information to the console using console.log:
it("Home page should have the correct title", async () => { await page.goto("https://www.carlrippon.com/"); console.log("page title", await page.title()); expect(await page.title()).toBe("All posts | Building SPAs");});We then see this output to the terminal:
We can also take screen shots at various points in the test:
it("Home page should have the correct title", async () => { await page.goto("https://www.carlrippon.com/"); await page.screenshot({ path: `./screenshots/home-${browserName}.png` }); expect(await page.title()).toBe("All posts | Building SPAs");});The screenshots will be placed in a screenshots folder after the test has finished running.
browserName is a global variable that gives the name of the browser currently being tested.
A more productive debugging approach is to use the node debugger within VS Code. To set this up, we first need to add the following launch.json file in a .vscode folder:
{ "version": "0.2.0", "configurations": [ { "name": "Debug Jest Tests", "type": "node", "request": "launch", "program": "${workspaceFolder}/node_modules/.bin/jest", "args": ["--runInBand"], "windows": { "program": "${workspaceFolder}/node_modules/jest/bin/jest" }, "console": "integratedTerminal", "internalConsoleOptions": "neverOpen" } ]}We have called our launch configuration Debug Jest Tests and we are simply telling the node process to execute Jest.
Our test has been running in headless mode so far. Let’s change it so that we can see the browsers being opened and pages being interacted with. In jest.config.js we can add the following launch option to do this:
module.exports = { ..., testEnvironmentOptions: { "jest-playwright": { browsers: ["chromium", "firefox", "webkit"], launchOptions: { headless: false, }, }, }, ...};Let’s set a breakpoint in our test by clicking in the margin on the line of code we want to break on.
If we open the run section in the left-hand panel, we’ll see our configuration next to a green triangle icon:
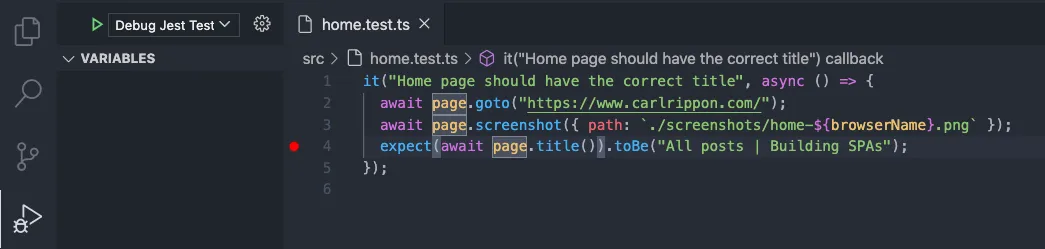
We can click on this green triangle icon to start the debugger.
The test will run, and we’ll see the first browser open. Eventually the test will stop on our breakpoint:

We can step through code, watch variables, and see the call stack to diagnose problems quickly.
We also have full access to the DevTools in the browser that the test opened, which is handy for debugging visual problems.
Nice. 😀
Learn React with TypeScript - 3rd Edition
NewA comprehensive guide to building modern React applications with TypeScript. Learn best practices, advanced patterns, and real-world development techniques.
View on Amazon